Dify离线部署

联网环境+直接部署

Dify的离线部署有Docker部署和源码部署两种方式,比较推荐Docker部署,方便维护也不容易搞崩,简单拉取一下镜像就可以。这里主要介绍Docker的部署方法。

使用Docker Compose部署:Docker 19.03 或更高版本、Docker Compose 1.25.1或更高版本

安装Dify之前,需要确保你的机器已满足最低安装要求:CPU>2 Core RAM >= 4GB

首先,克隆源码到本地。

1
git clone https://github.com/langgenius/dify.git

可以获得Dify的源码结构:

1
2
3
4
5
6
7
8
9
10
11
12
13
14
15
├── .devcontainer/    # 开发容器配置
├── .github/ # CI/CD 与工作流配置
├── .vscode/ # VS Code 专用配置
├── api/ # 后端服务(FastAPI 接口)
├── dev/ # 本地开发脚本与工具
├── docker/ # Docker 镜像与容器配置
├── images/ # 存放静态图片资源
├── sdks/ # 客户端 SDK
├── web/ # 前端界面(Next.js + React)
├── plugins/ # 扩展插件,每个子目录一个插件
├── workers/ # 异步任务调度与执行
├── infra/ # 部署与运维配置(Docker Compose / Kubernetes)
├── .env.example # 环境变量示例
├── README.md # 项目说明文档
└── .gitignore # Git 忽略规则

接着可以就可以启动Dify:

  1. 进入docker源码目录
1
cd docker
  1. 修改.env环境变量配置文件
1
cp .env.example .env
  1. 使用docker-compose启动Dify
1
docker-compose up -d

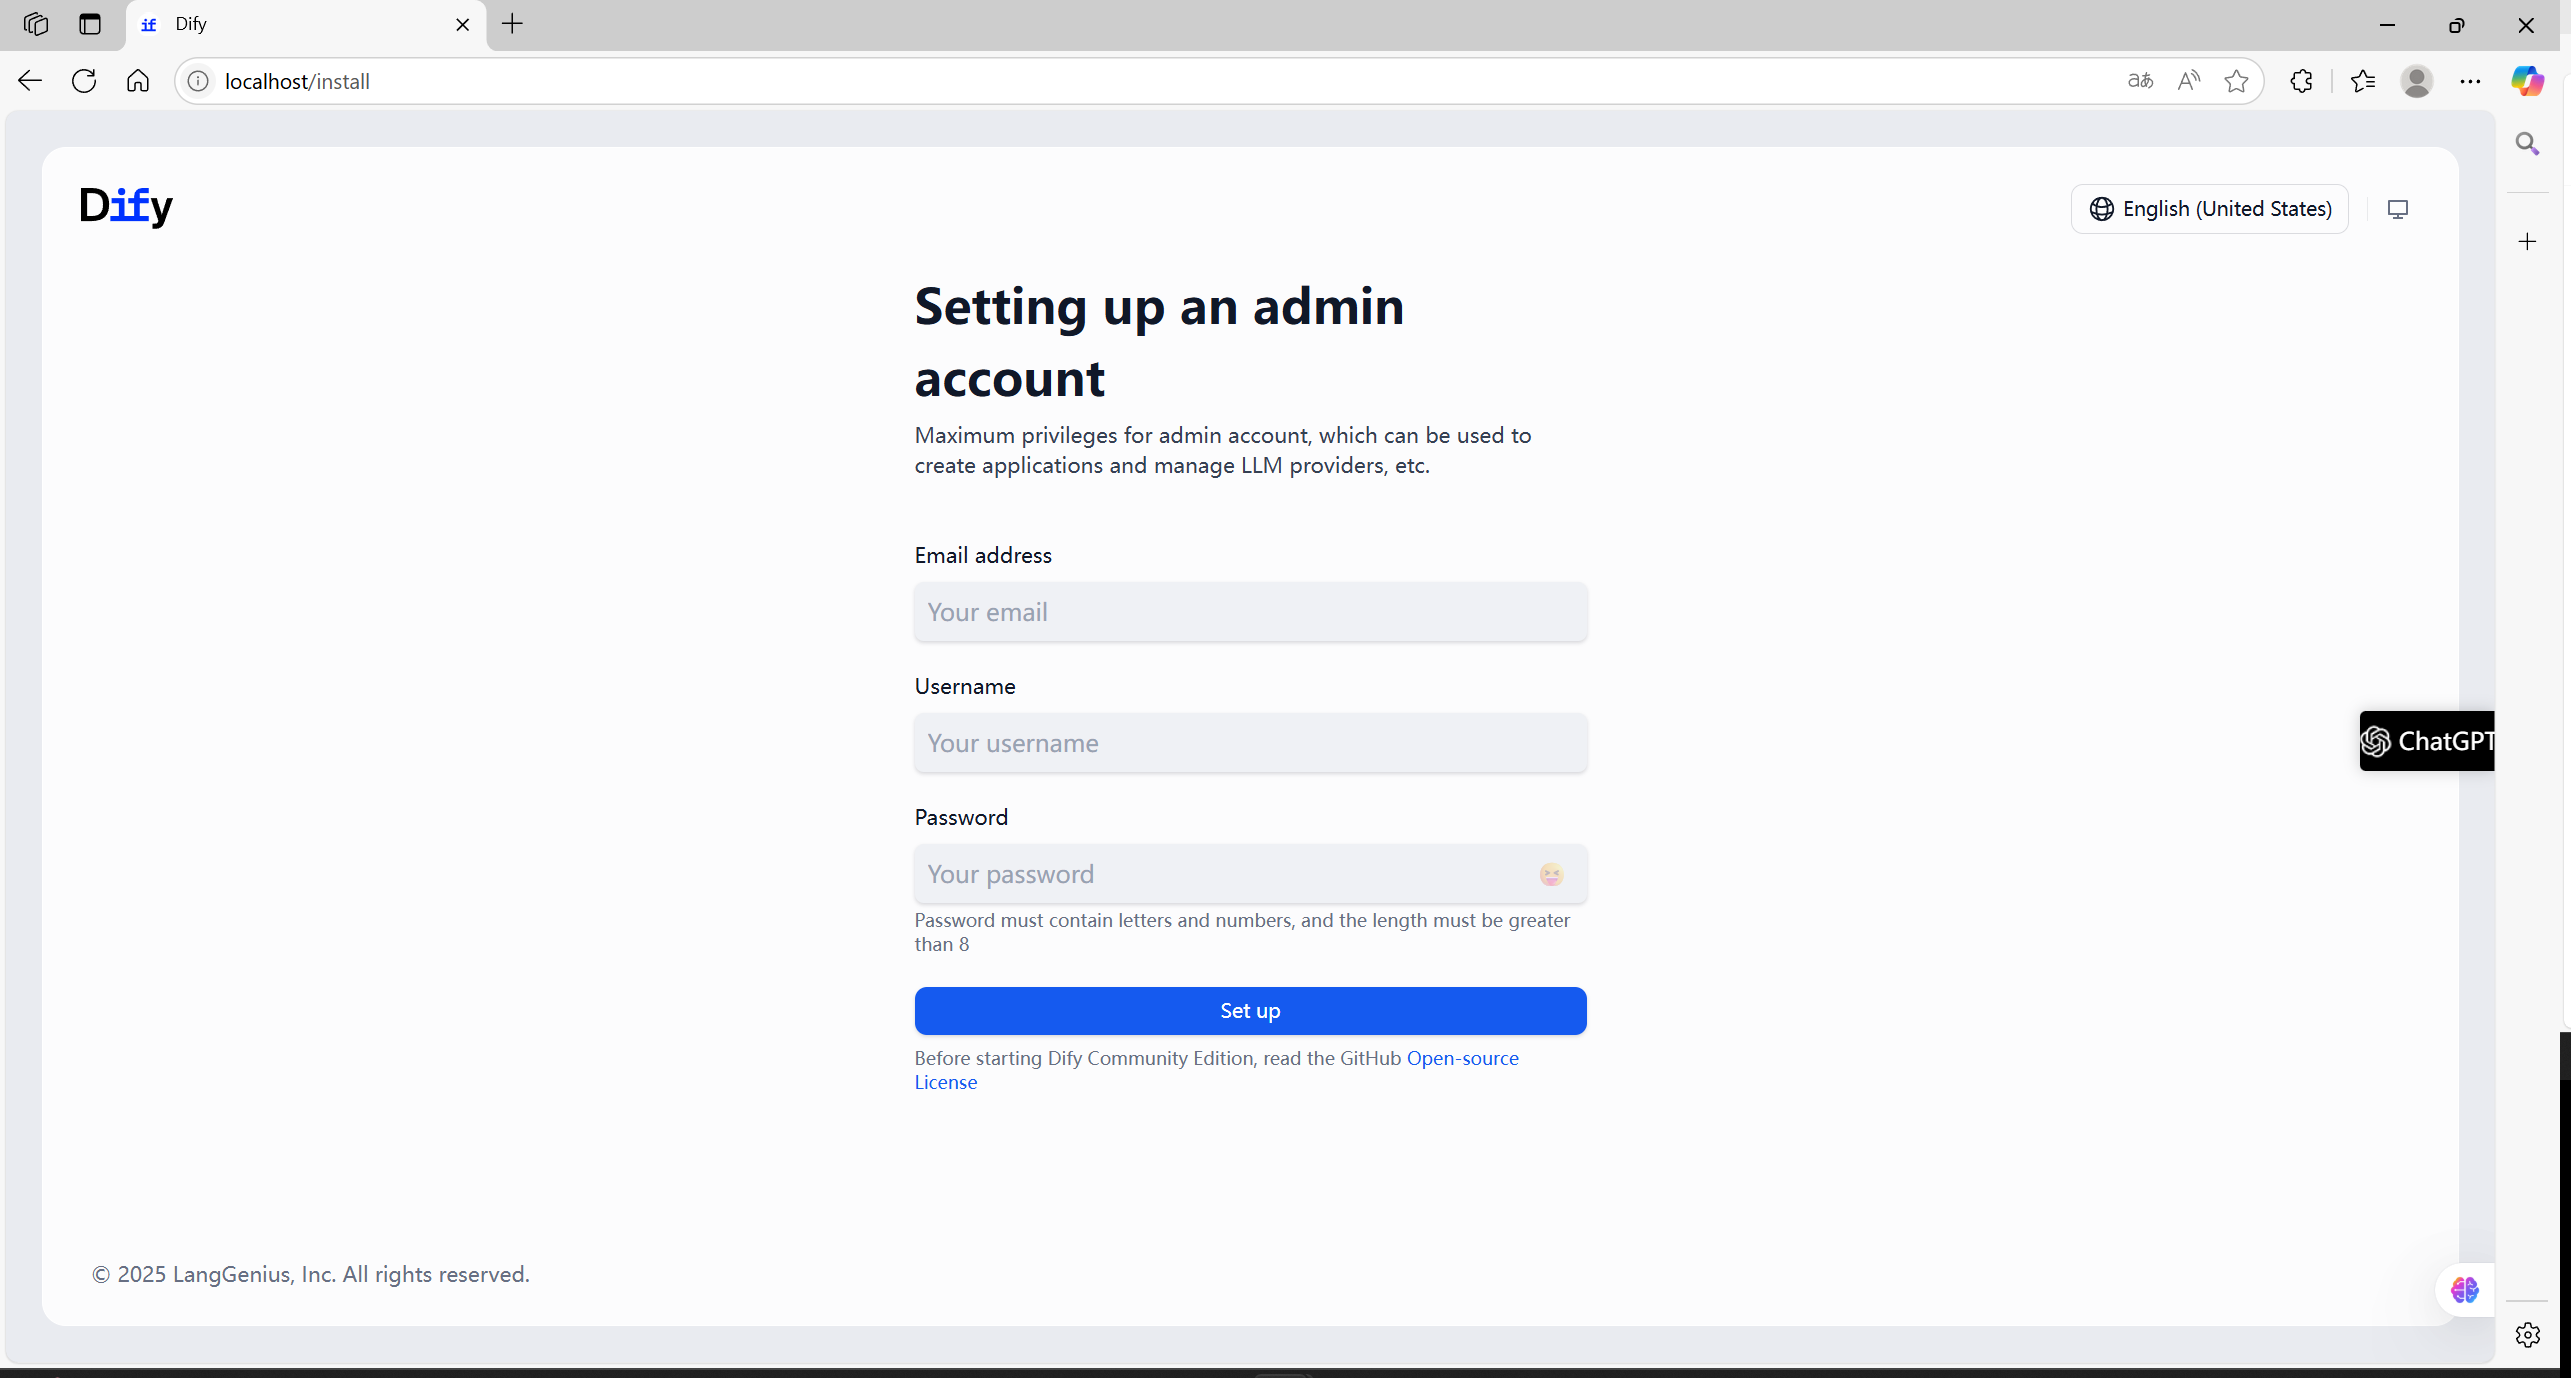
如图正常启动后,使用浏览器访问localhost即可访问Dify,如图就是设置管理员账户的账号密
码,注册登录之后即可正常使用


离线环境部署

适用于部署主机处于特定专网和内网环境下,需要提前获取部署Dify所需要的所有镜像和Dify项目代码目录。

方法一:从联网环境下pulling好之后打包拷贝进离线环境

1
2
3
4
5
6
7
8
9
10
11
mkdir docker_images
cd docker_images

docker save langgenius/dify-web:0.15.3 -o dify-web.tar
docker save langgenius/dify-api:0.15.3 -o dify-api.tar
docker save postgres:15-alpine -o postgres.tar
docker save nginx:latest -o nginx.tar
docker save langgenius/dify-sandbox:0.2.10 -o dify-sandbox.tar
docker save redis:6-alpine -o redis.tar
docker save ubuntu/squid:latest -o squid.tar
docker save semitechnologies/weaviate:1.19.0 -o weaviate.tar

方法二:提前下载好所有镜像包和docker-compose文件

注意将以下文件传输到离线服务器:

  • Dify 项目代码目录。
  • docker_images 目录(包含所有 .tar 或 .tar.gz 文件)。

拷贝到离线环境之后,使用docker load加载所有镜像:

1
2
3
4
5
6
7
8
9
10
cd docker_images

docker load -i dify-web.tar.gz
docker load -i dify-api.tar.gz
docker load -i postgres.tar.gz
docker load -i nginx.tar.gz
docker load -i dify-sandbox.tar.gz
docker load -i redis.tar.gz
docker load -i squid.tar.gz
docker load -i weaviate.tar.gz

全部加载完成后,进入项目目录,配置环境变量并启动Dify

1
2
3
4
cd /dify/docker
cp .env.example .env

docker compose up -d

修改部署的端口

使用以上方法部署的Dify,默认的端口是80,可以通过修改.envdocker-compose.yaml调整Dify-web服务的端口。

注意防火墙安全组规则的放行。


离线安装插件

在离线的环境下,Dify是无法访问官方的插件仓库的,需要我们手动在联网环境打包好插件拷贝到离线环境中。

使用以下命令来下载Dify插件打包工具

1
git clone https://github.com/junjiem/dify-plugin-repackaging.git

这里以打包ollama 0.0.3插件为例:

1
./plugin_repackaging.sh market langgenius ollama 0.0.3

如果已有 .difypkg 文件,也可使用 local 模式打包

1
./plugin_repackaging.sh local ./xxx.difypkg

将打包好的插件拷贝到离线环境后,需要修改.env配置文件来保证插件正常安装:

1
2
3
FORCE_VERIFYING_SIGNATURE=false		# Dify 平台允许安装所有未在 Dify Marketplace 上架(审核)的插件
PLUGIN_MAX_PACKAGE_SIZE=524288000 # Dify 平台允许安装 500M 大小以内的插件
NGINX_CLIENT_MAX_BODY_SIZE=500M # Nginx客户端将允许上传 500M 大小以内的内容

接着重启Dify

1
docker compose down docker compose up -d

重启后进入Dify应用里,点击右上角的插件,安装插件处选择本地插件,导入等待安装完成即可。
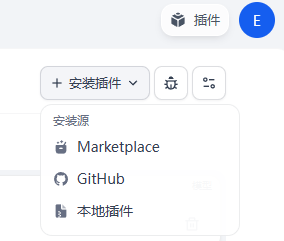

Dify部署问题处理

docker_api_1等服务一直处于重启状态

docker-compose up -d之后,查看容器状态时一直有几个容器在重启:

1
2
3
4
5
6
7
8
9
10
docker_api_1           /bin/bash /entrypoint.sh         Restarting
docker_db_1 docker-entrypoint.sh postg ... Up (healthy) 5432/tcp
docker_nginx_1 sh -c cp /docker-entrypoin ... Up 0.0.0.0:444->443/tcp,:::444->443/tcp, 0.0.0.0:7002->80/tcp,:::7002->80/tcp
docker_plugin_daemon_1 /bin/bash -c /app/entrypoi ... Up 0.0.0.0:5003->5003/tcp
docker_redis_1 docker-entrypoint.sh redis ... Up (healthy) 6379/tcp
docker_sandbox_1 /main Restarting
docker_ssrf_proxy_1 sh -c cp /docker-entrypoin ... Up 3128/tcp
docker_weaviate_1 /bin/weaviate --host 0.0.0 ... Up
docker_web_1 /bin/sh ./entrypoint.sh Up 3000/tcp
docker_worker_1 /bin/bash /entrypoint.sh Restarting

我们可以先查看相关容器日志

1
docker logs docker_api_1 #若没有设置容器名,把容器名改为容器ID前四位

发现是权限问题:

1
2
OpenBLAS blas_thread_init: pthread_create failed for thread 2 of 4: Operation not permitted
runtime/cgo: pthread_create failed :Operation not permitted

这种情况需要我们给权限缺失的容器添加特权运行配置
docker-compose.yaml中找到并添加:

1
2
3
4
api: 
image: langgenius/dify-api:1.4.1
restart: always
privileged: true #添加的内容

接着重新启动Dify,就可以正常运行。

本地安装模型时失败,提示init environment for plugin langgenius/openai:0.0.26 failed too many times you should consider the package is corrupted or your network is unstable

这个报错与提供插件服务的dockerdocker_plugin_daemon有关,查看容器日志:

1
docker logs plugin_daemon #若没有设置容器名,把容器名改为容器ID前四位
1
2
3
4
[ERROR]init environment failed: failed to install dependencies: exit status 2, output: error: Failed to unzip wheel: openai-1.64.0-py3-none-any.whl
Caused by: an upstream reader returned an error: io error occurred: HTTP status client error (403 Forbidden) for url (https://pypi.tuna.tsinghua.edu.cn/packages/9a/e6d503e1ea474522b2a15a904bb/openai-1.64.0-py3-none-any.whl)
Caused by: io error occurred: HTTP status client error (403 Forbidden) for url (https://pypi.tuna.tsinghua.edu.cn/packages/9a/1a/e62718f311daa26d208800976d7944e5ee64.0-py3-none-any.whl)
Caused by: HTTP status client error (403 Forbidden) for url (https://pypi.tuna.tsinghua.edu.cn/packages/9a/1a/e62718f311daa26d208800976d7944e5ee6d503e1ea474522b2a15l)

还是权限问题,给docker_plugin_daemon容器添加特权配置:

1
2
3
4
plugin_daemon:
    image: langgenius/dify-plugin-daemon:0.2.0-local
    restart: always
privileged: true #添加的内容

参考链接

Dify离线安装插件教程
dify离线部署